9. Remove the rear piston. Use an offset open end wrench to hold the nut at
the front of the piston, while the rear nut is being removed. Because this nut
is thin and is in the recess formed by the piston, an ordinary wrench will tend
to slip off and damage the nut.
10. Take out the retainer pin front the piston rod, Fig. 10, which allows the
push rod to be removed.
11. Remove the pin from the piston rod port holes (this pin was inserted temporarily
- see paragraph 8); slip the center plate and release spring off of the piston
rod.
12. Hold the nut on the front of the front pis ton is a vise and remove this
nut from the front of the piston, after which the piston c an be taken off of
the piston rod. See Fig. 49.
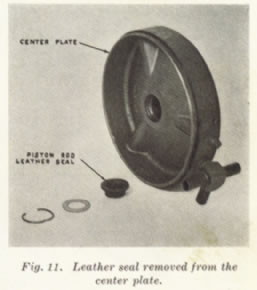
13. Remove the piston rod leather seal from the center plate. This seal is held
in place by a snap ring and washer. See Fig. 11.
Control Valve
14. Remove the control valve assembly from the front cylinder shell.
15. Loosen the lock nut and remove the small hydraulic cylinder from the control
valve.
16. Dissassemble the hydraulic cylinder for inspection as illustrated in Fig.
16.
17. Remove the diaphragm cover and spacer ring.
18. Remove the vacuum valve seat, vacuum valve and diaphragm as sembly, Fig.
14.
19. To take out the diaphragm and triangular linkage assembly, coni press the
spring with the fingers as shown in Fig. 13.
20. Take off the lower part of the valve body and remove the atmos pheric valve spring and washer as illustrated, Fig. 15.
Page <11>