ASSEMBLY
(First Series)
21. Clean all parts of the Hydrovac thoroughly. Bendix Cleaner is recommended
for cleaning metal parts. Use alcohol for cleaning hydraulic parts. Do not use
gasoline, kerosene or Bendix Cleaner on rubber parts or on parts from the hydraulic
system.
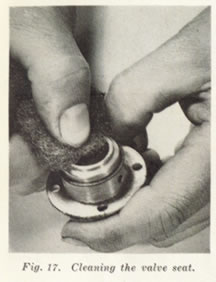
22. Inspect all parts for wear or damage. if the valve seats are slightly pitted
or corroded, they may be cleaned with fine steel wool, Fig. 17.
23. Install a new diaphragm and new gaskets in the control valve. Clean all
flange surfaces to insure an air tight fit. Compress the diaphragm spring and
washer as shown in Fig. 18 to assemble link pins in the valve stems.
Fig. 19 shows where the special washer will be on the pins in the lower
body section when the diaphragm is in place.
24. Lubricate the internal linkage of the control valve with Bendix Cable Lubricant.
25. When assembling the control valve, be sure the by pass holes in the spacer
plate, valve body, diaphragm and gasket all line up so that the passage is clear.
See illustration Fig. 12.
26. While tightening the diaphragm screws, Fig. 20, hold the diaphragm down
just enough to close the vacuum valve. This prevents buckling of the diaphragm
between the screw holes.
27. If the hydraulic cylinder of the control valve is scored or pitted, the
part should be replaced. It is not practicable to refinish this bore because
of its small diameter and the unavoidable enlargement of the bore.
28. When assembling the control valve hydraulic cylinder and plunger. be particularly
sure that all parts are clean and free from grit. Blow out all passages with
compressed air and wipe the bore of the cylinder clean and dry with a cloth.
Do not lay parts on the bare work bench where they may pick up dirt; place them
on a clean paper.