DISASSEMBLY
(First Series)
1. Mark the cylinder shells, center plate and hydraulic cylinder with a center
punch or scriber so that those parts can be reassembled in their original
relative positions.
2. Remove the through-bolts which hold the cylinder shells and center plate
together.
3. Remove the hydraulic juniper line which runs from the control valve to
the hydraulic cylinder.
4. Loosen the hose clamps and loosen the hoses by turning them slightly with
pliers.
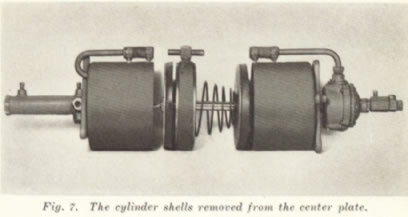
5. Separate the cylinder shells from the center plate. See Fig. 7. Tap
with a rawhide mallet if the parts stick together. Hold the unit over a pail
to catch the oil as the parts are separated.
6. Remove the hydraulic cylinder by taking out the four cap screws which hold
it lii place. See Fig. 8.
7. Remove the end plug from the hydraulic cylinder, Fig. 9, after
which the hydraulic piston and related parts can be removed.
8. Compress the power cylinder piston release spring and hold it in the compressed
position by inserting a pin through the port holes in the piston rod as illustrated
in Fig. 10. The spring is to be held compressed in this manner while
disassembling the rear piston. As in other power units, the piston rod (push
rod) end of the Hydrovac is referred to as the rear, regardless of the position
of the unit on the vehicle.